

PagerDuty + Elaichi
Connect your PagerDuty account to Elaichi once. Then your team can check incidents, find who is on call, and act on incidents from Claude, ChatGPT, Cursor, any MCP client, or the Elaichi Agent. Every call uses the access of the person who approved it, and admins decide who can use which PagerDuty tool.
Benefits
- Ask about incidents in plain language. List open incidents, summarize the last week, or pull the full history of one incident without opening PagerDuty.
- Find who is on call right now. Ask for the current on-call person for a service or schedule, and get the answer in the same conversation.
- Act on incidents from your AI client. Acknowledge, resolve, reassign, or add a note to an incident when you ask for it.
- Work across your other tools in the same request. Link a PagerDuty incident to a Jira ticket, a Slack thread, or a support case through Elaichi's other connectors.
- Share one connection without sharing credentials. Connect PagerDuty once and share it with a team. Nobody else handles the token.
- Keep admin control. Restrict PagerDuty tools by role or member, for example read-only for most people. Every call is recorded in the audit log.
How it works
Elaichi connects to PagerDuty through the PagerDuty REST API with OAuth 2.0. Elaichi does not send events or alerts into PagerDuty services, and it does not use integration keys or Event Orchestration.
flowchart LR
  Client["AI client<br/>(Claude, ChatGPT, Cursor, Elaichi Agent)"] -->|"MCP tool call"| Elaichi["Elaichi<br/>restrictions + audit log"]
  Elaichi -->|"REST API, OAuth 2.0"| PD["PagerDuty"]
  PD -->|"Response"| Elaichi
  Elaichi -->|"Result"| Client
- A person asks their AI client a question, or asks it to do something, in PagerDuty.
- The AI client calls a PagerDuty tool through your organization's Elaichi endpoint.
- Elaichi checks the call against your organization's restrictions. A restricted call is refused and nothing reaches PagerDuty.
- Elaichi calls the PagerDuty REST API with the OAuth token of the connected account. PagerDuty applies that user's own permissions.
- The result goes back to the AI client, and the call is recorded in the audit log.
Changes happen in PagerDuty only when someone asks for them, for example "acknowledge this incident". Elaichi does not change incidents, services, or schedules by itself.
Requirements
| Requirement | Detail |
|---|---|
| Elaichi account | Any plan, including the 14-day free trial at app.elaichi.ai/signup. |
| Elaichi permission | connection:create to connect PagerDuty. The built-in Member role includes it. |
| PagerDuty account | Any PagerDuty user can approve access. Elaichi acts with that user's PagerDuty permissions, so pick a user whose role allows what your team plans to do. For example, a user with the Observer role can read incidents but cannot acknowledge them. |
| AI client | Claude, ChatGPT, Cursor, any MCP client, or the Elaichi Agent in the web app. |
Support
For help with the PagerDuty connector, contact Elaichi support:
- Email: [email protected]
Setup
In PagerDuty
There is nothing to install or set up in PagerDuty. You do not need an integration key, a service extension, or an API key. You only sign in to PagerDuty and approve access during the next step.
In Elaichi
Connect PagerDuty
-
Sign in at app.elaichi.ai, or start a free trial at app.elaichi.ai/signup.
-
Open Connections and choose Add connection.
-
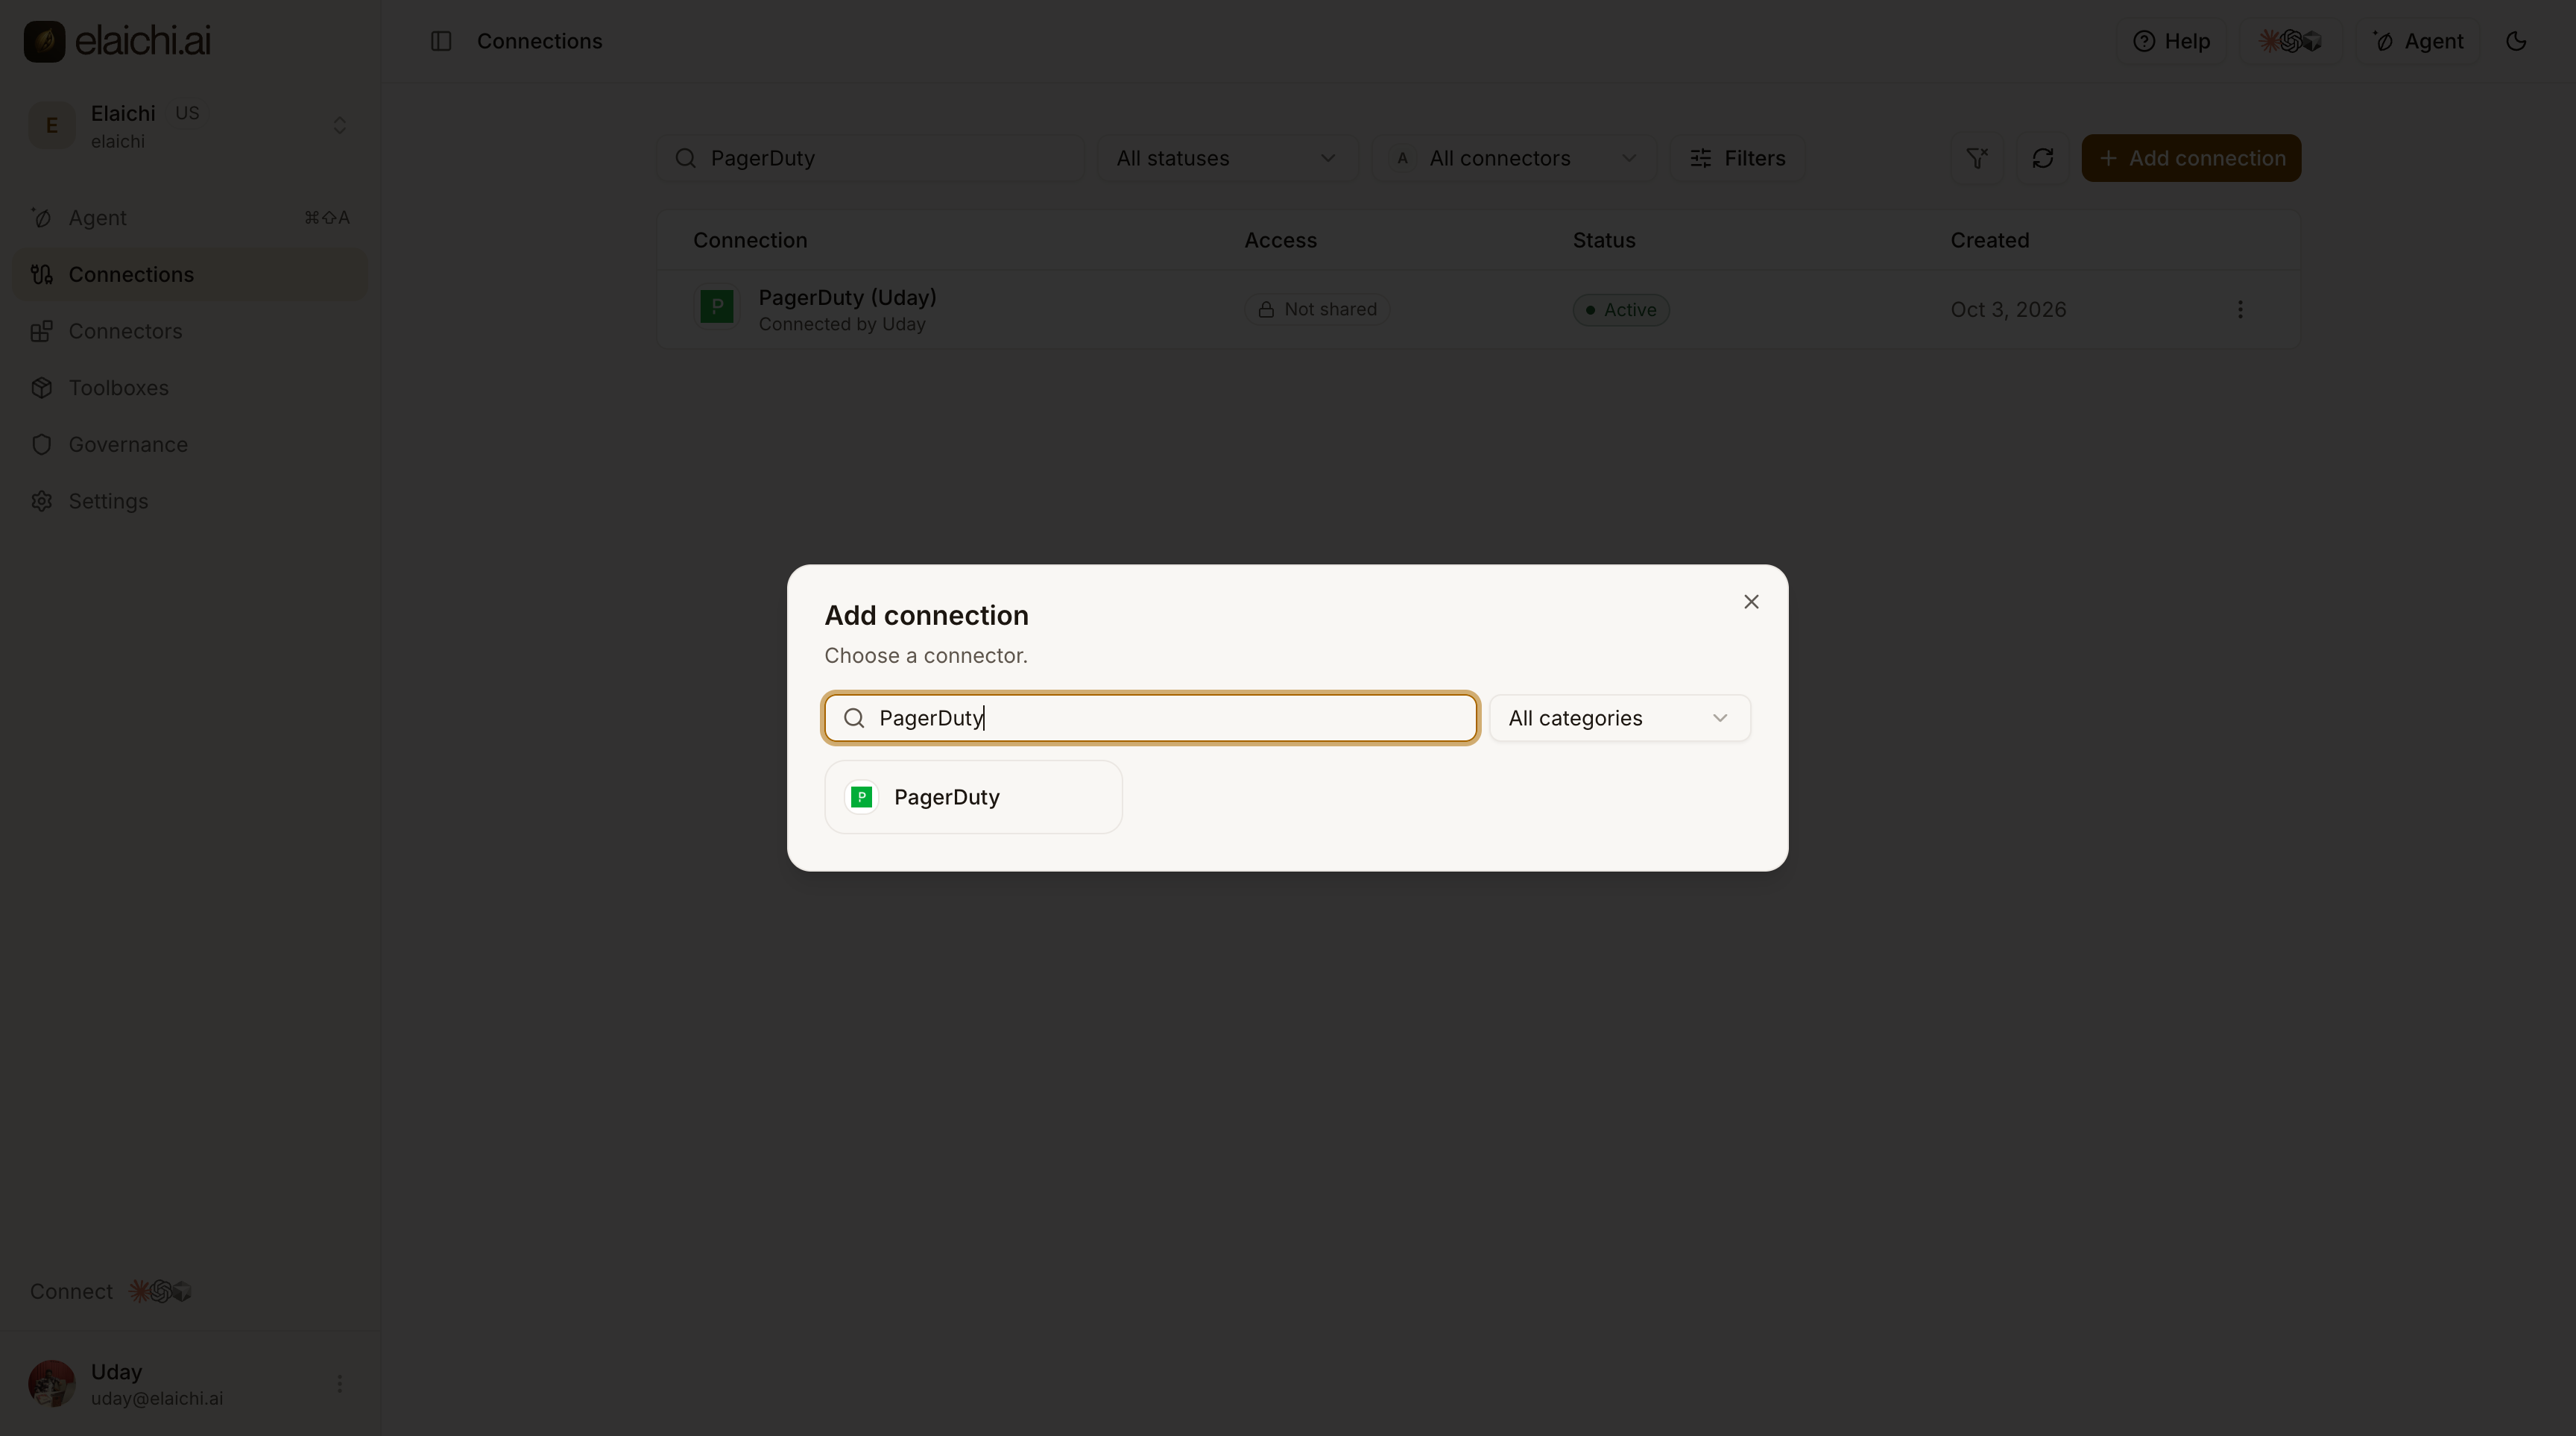
Search for PagerDuty and select it.
-
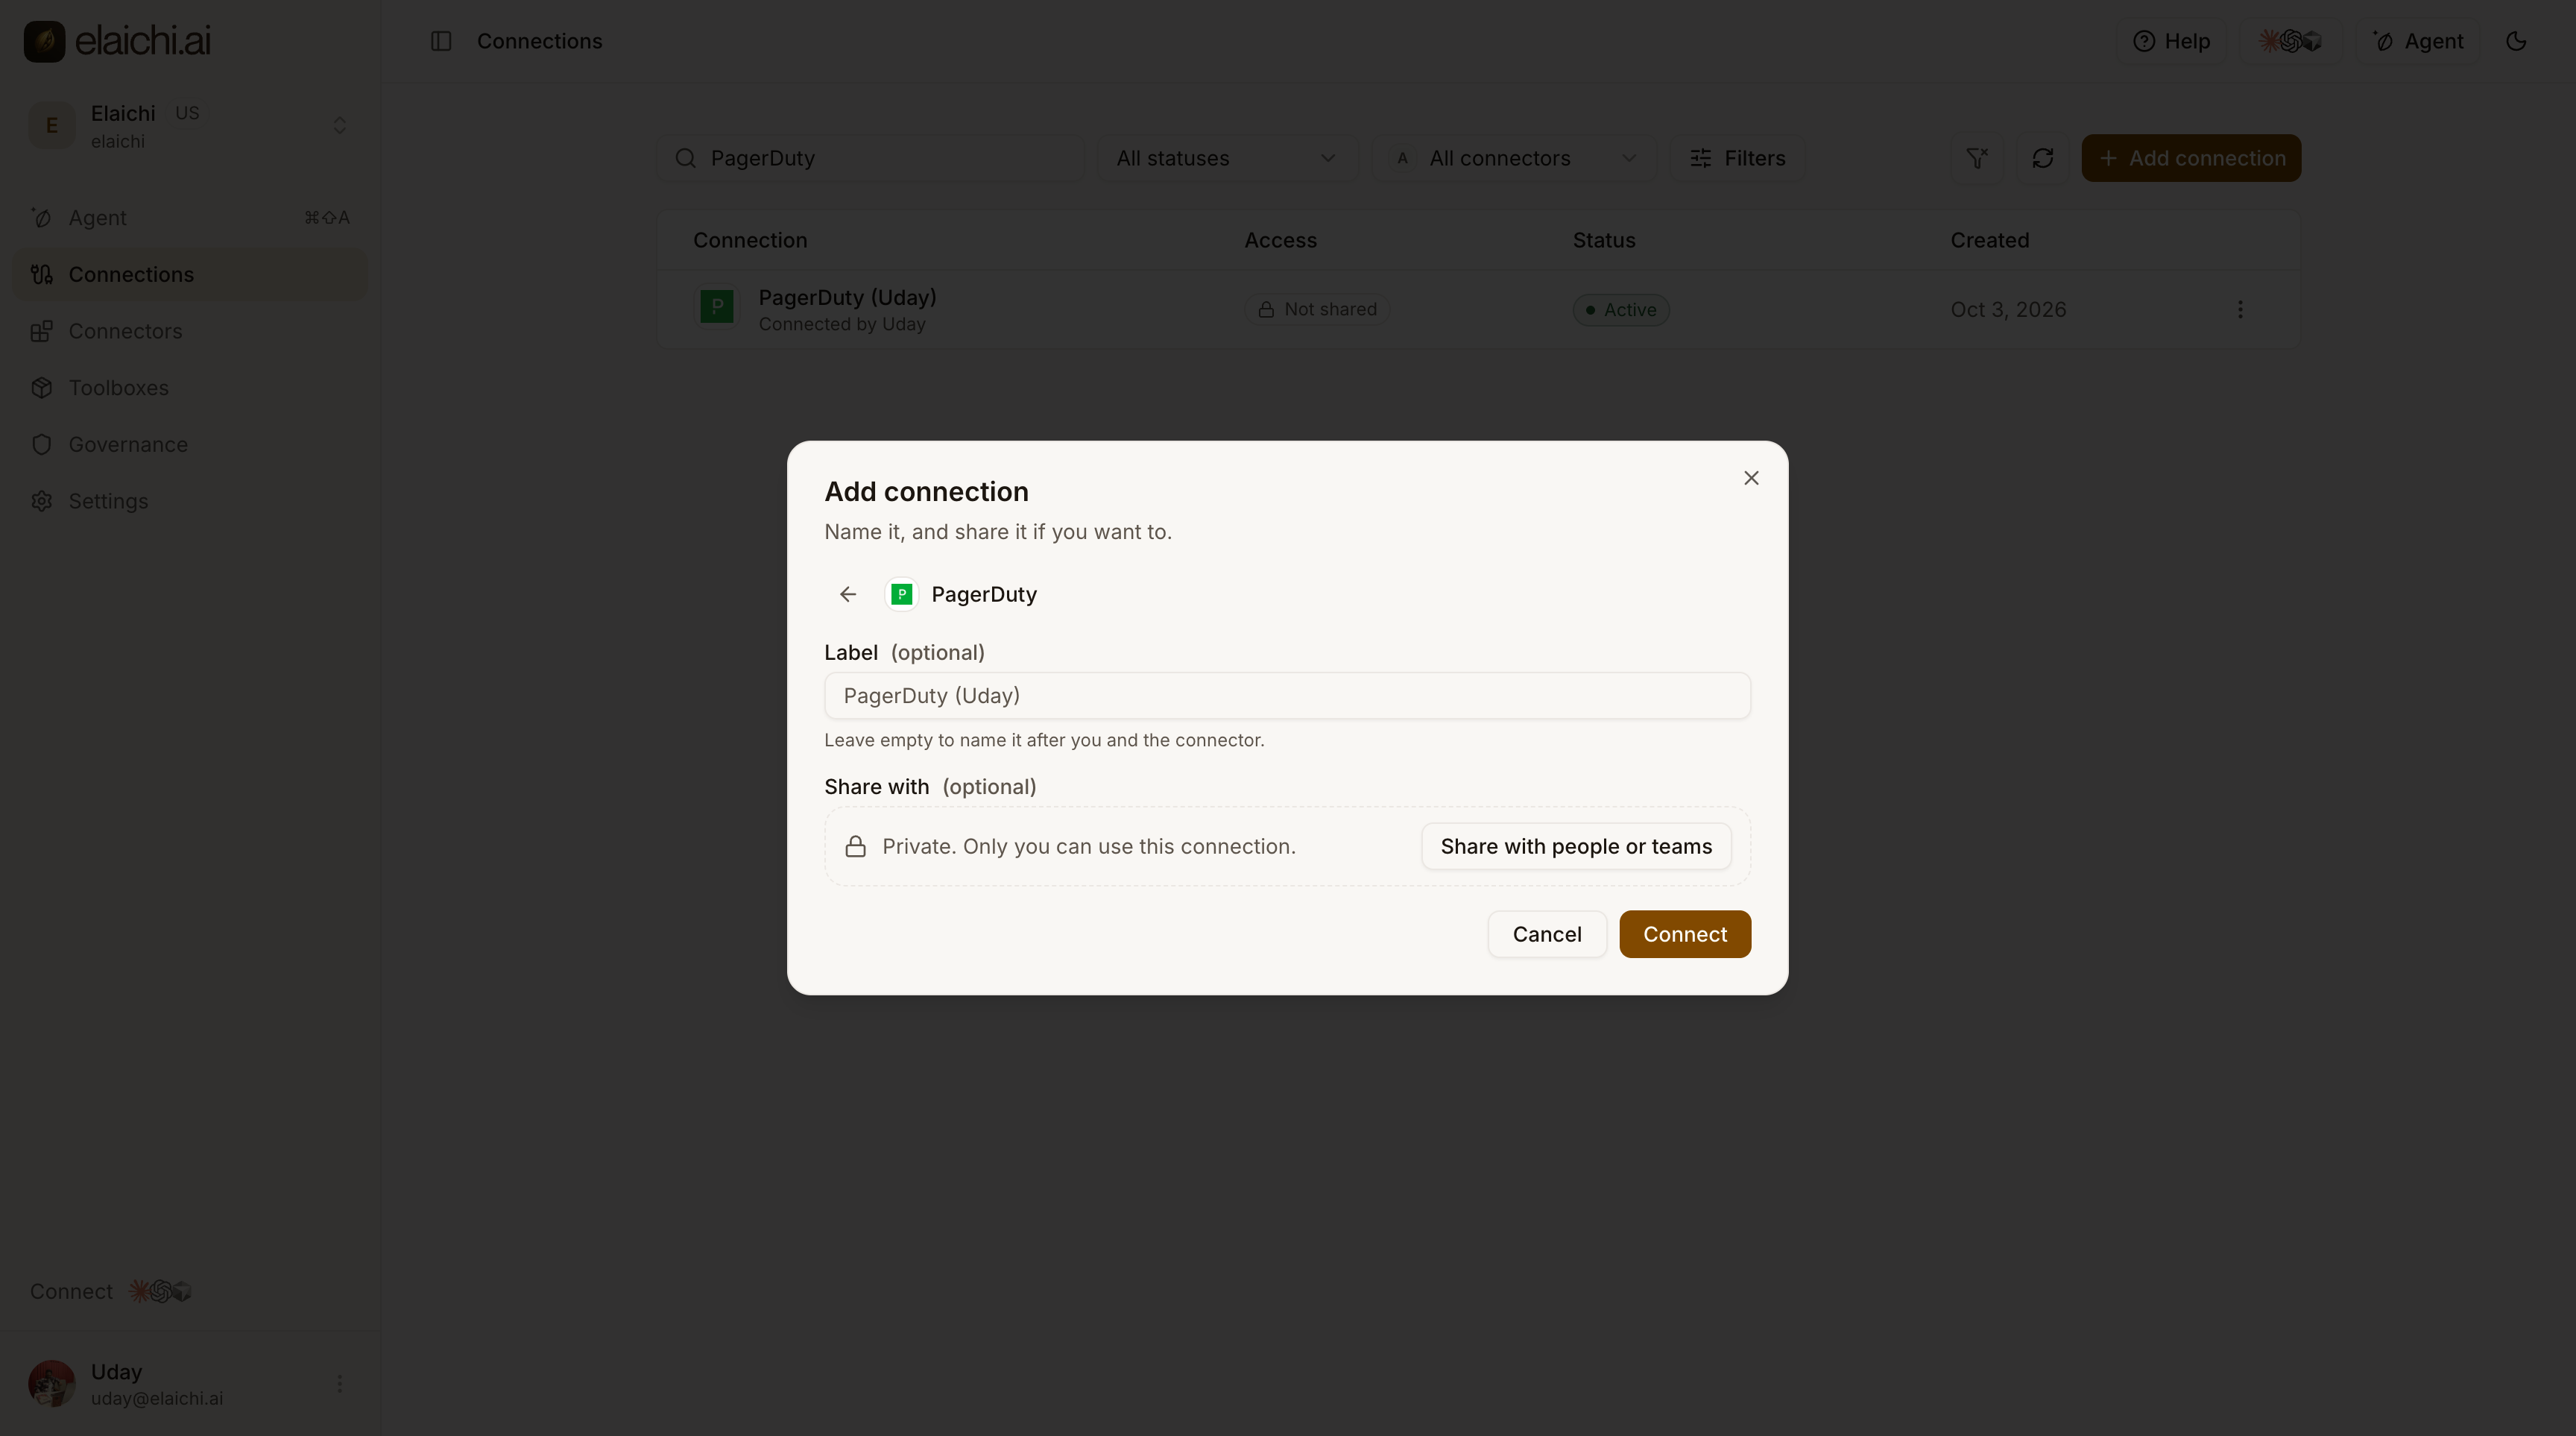
Optional: give the connection a Label. Leave it empty to name it after you and the connector.
-
Optional: choose Share with people or teams to share it with a member, a team, or everyone at your organization. Leave it as is to keep the connection private to you.
-
Choose Connect. A PagerDuty sign-in window opens.
-
Sign in to PagerDuty and approve access for Elaichi.
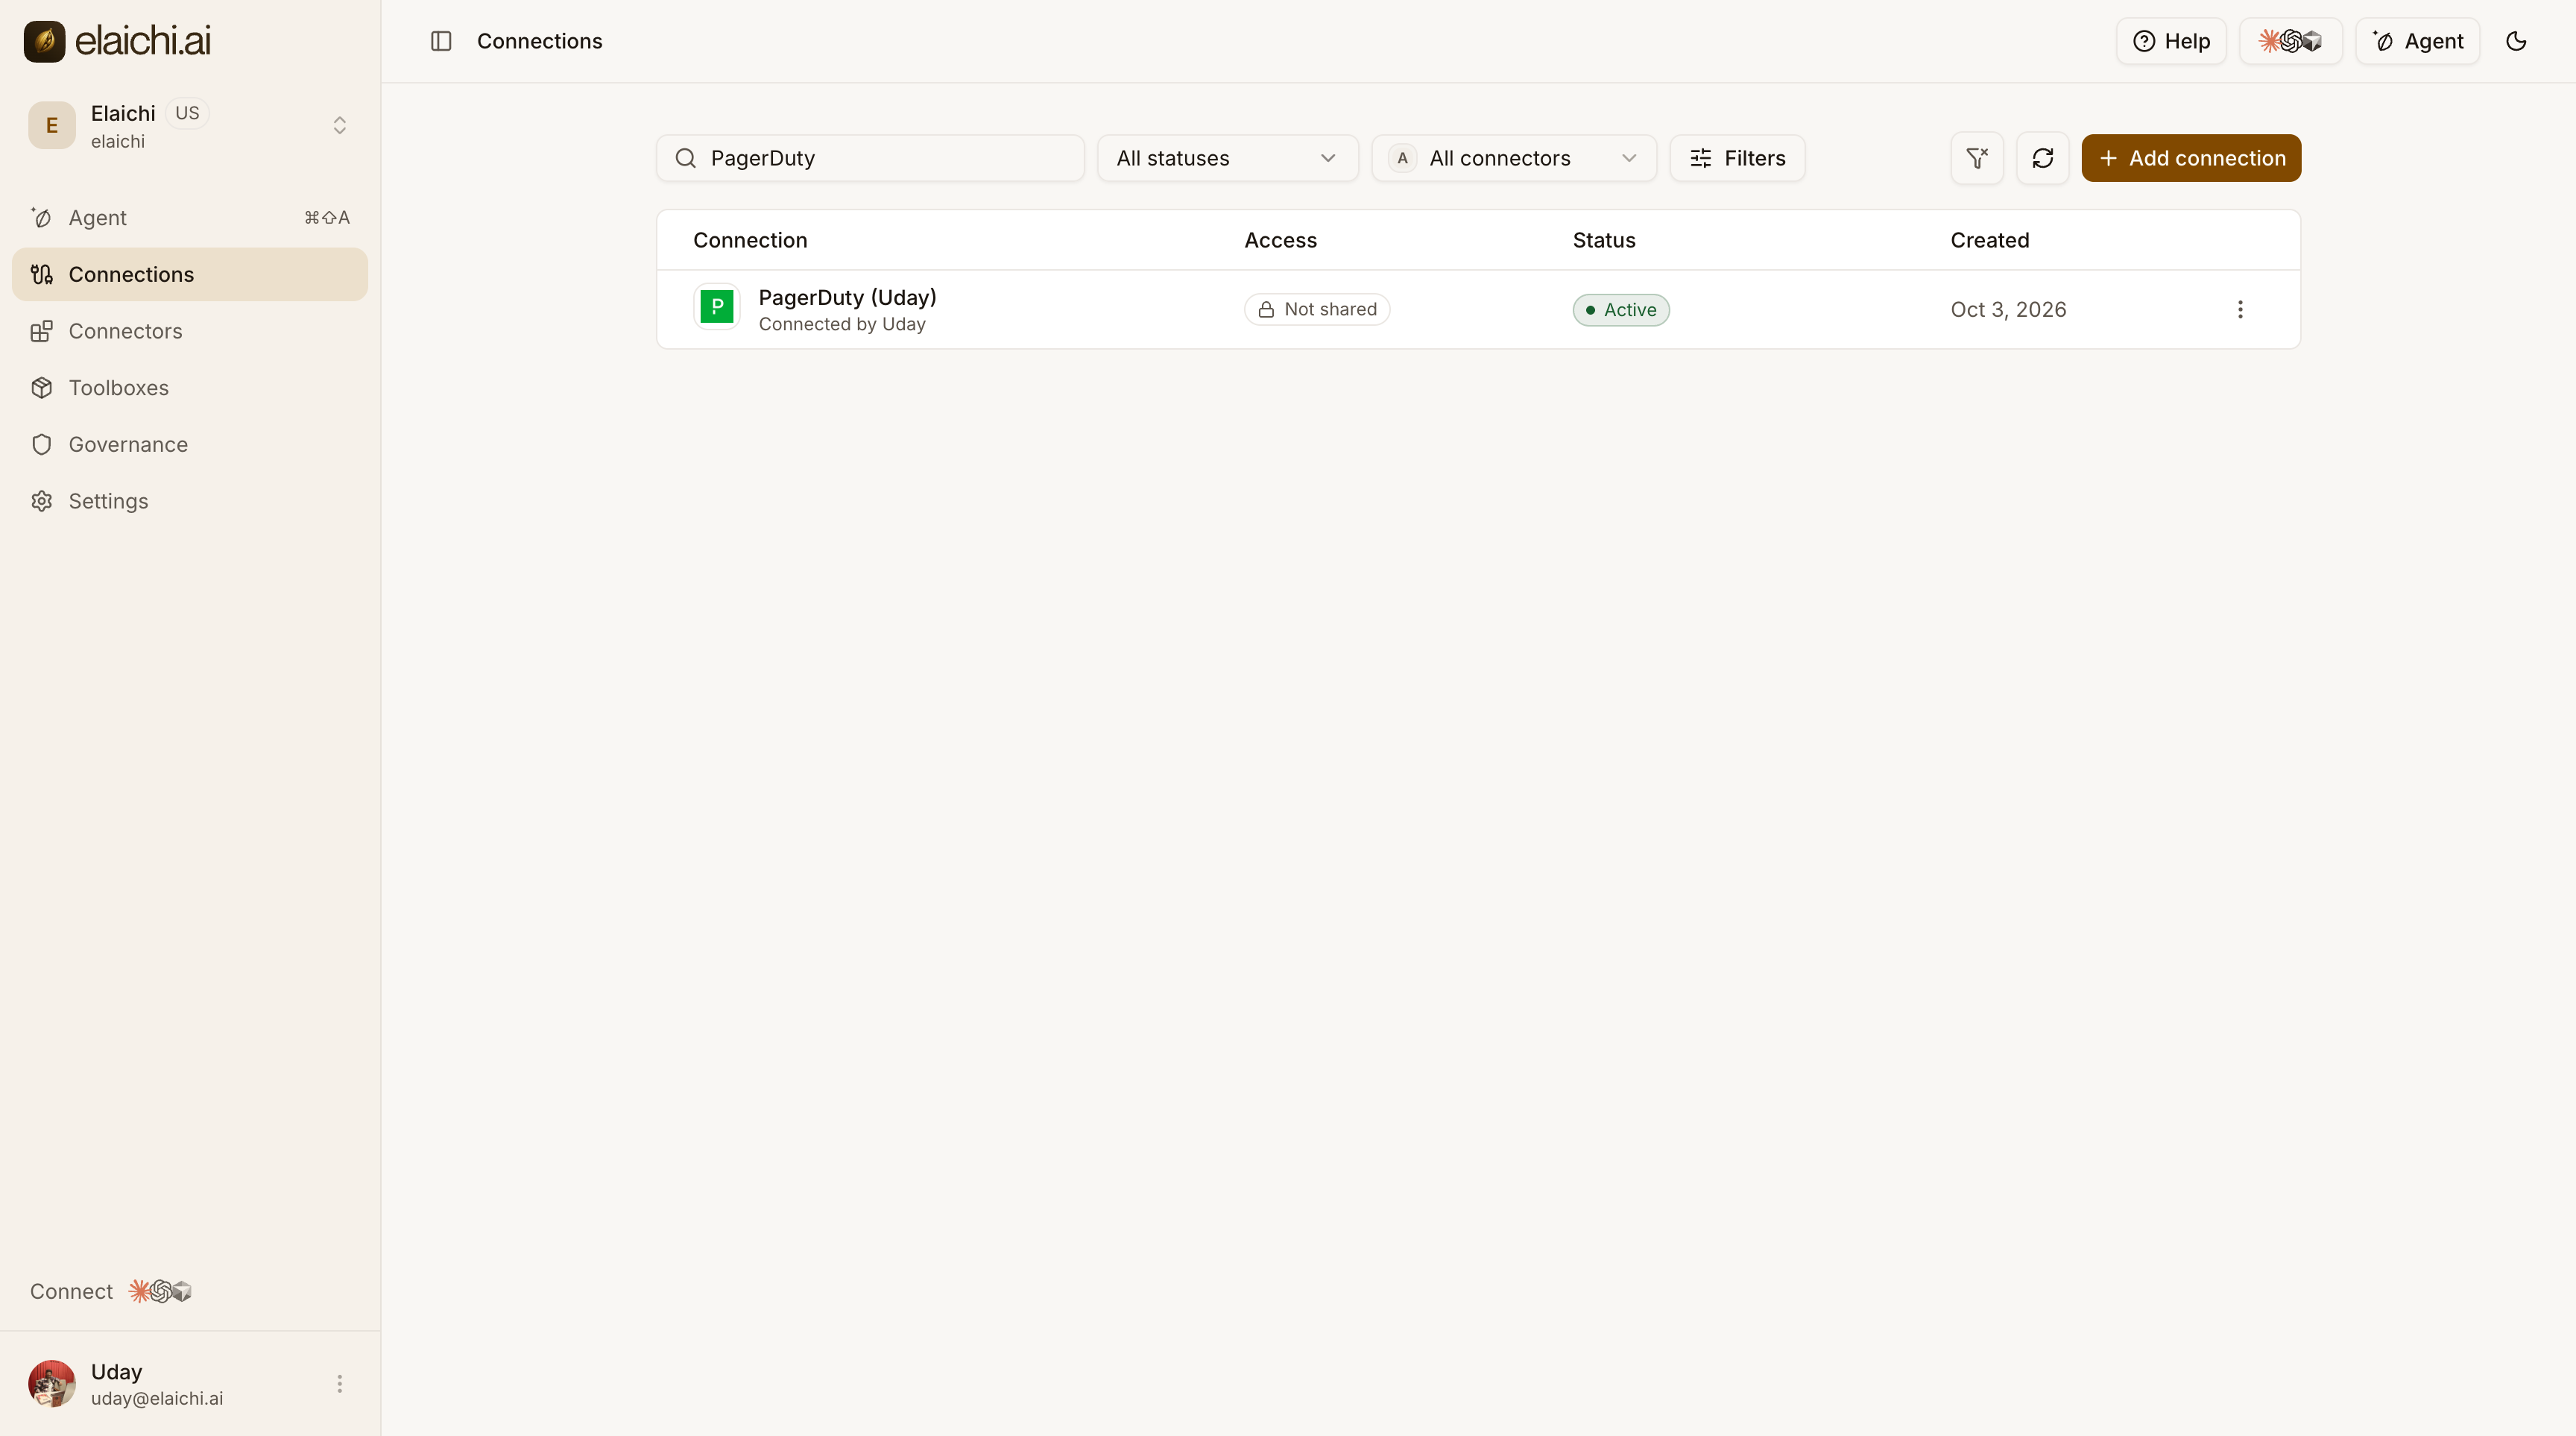
When the flow finishes, you see Connection added, and the PagerDuty connection shows the status Active. Elaichi also creates a connection toolbox for it under Toolboxes → My toolboxes.
Set who can use PagerDuty tools (optional)
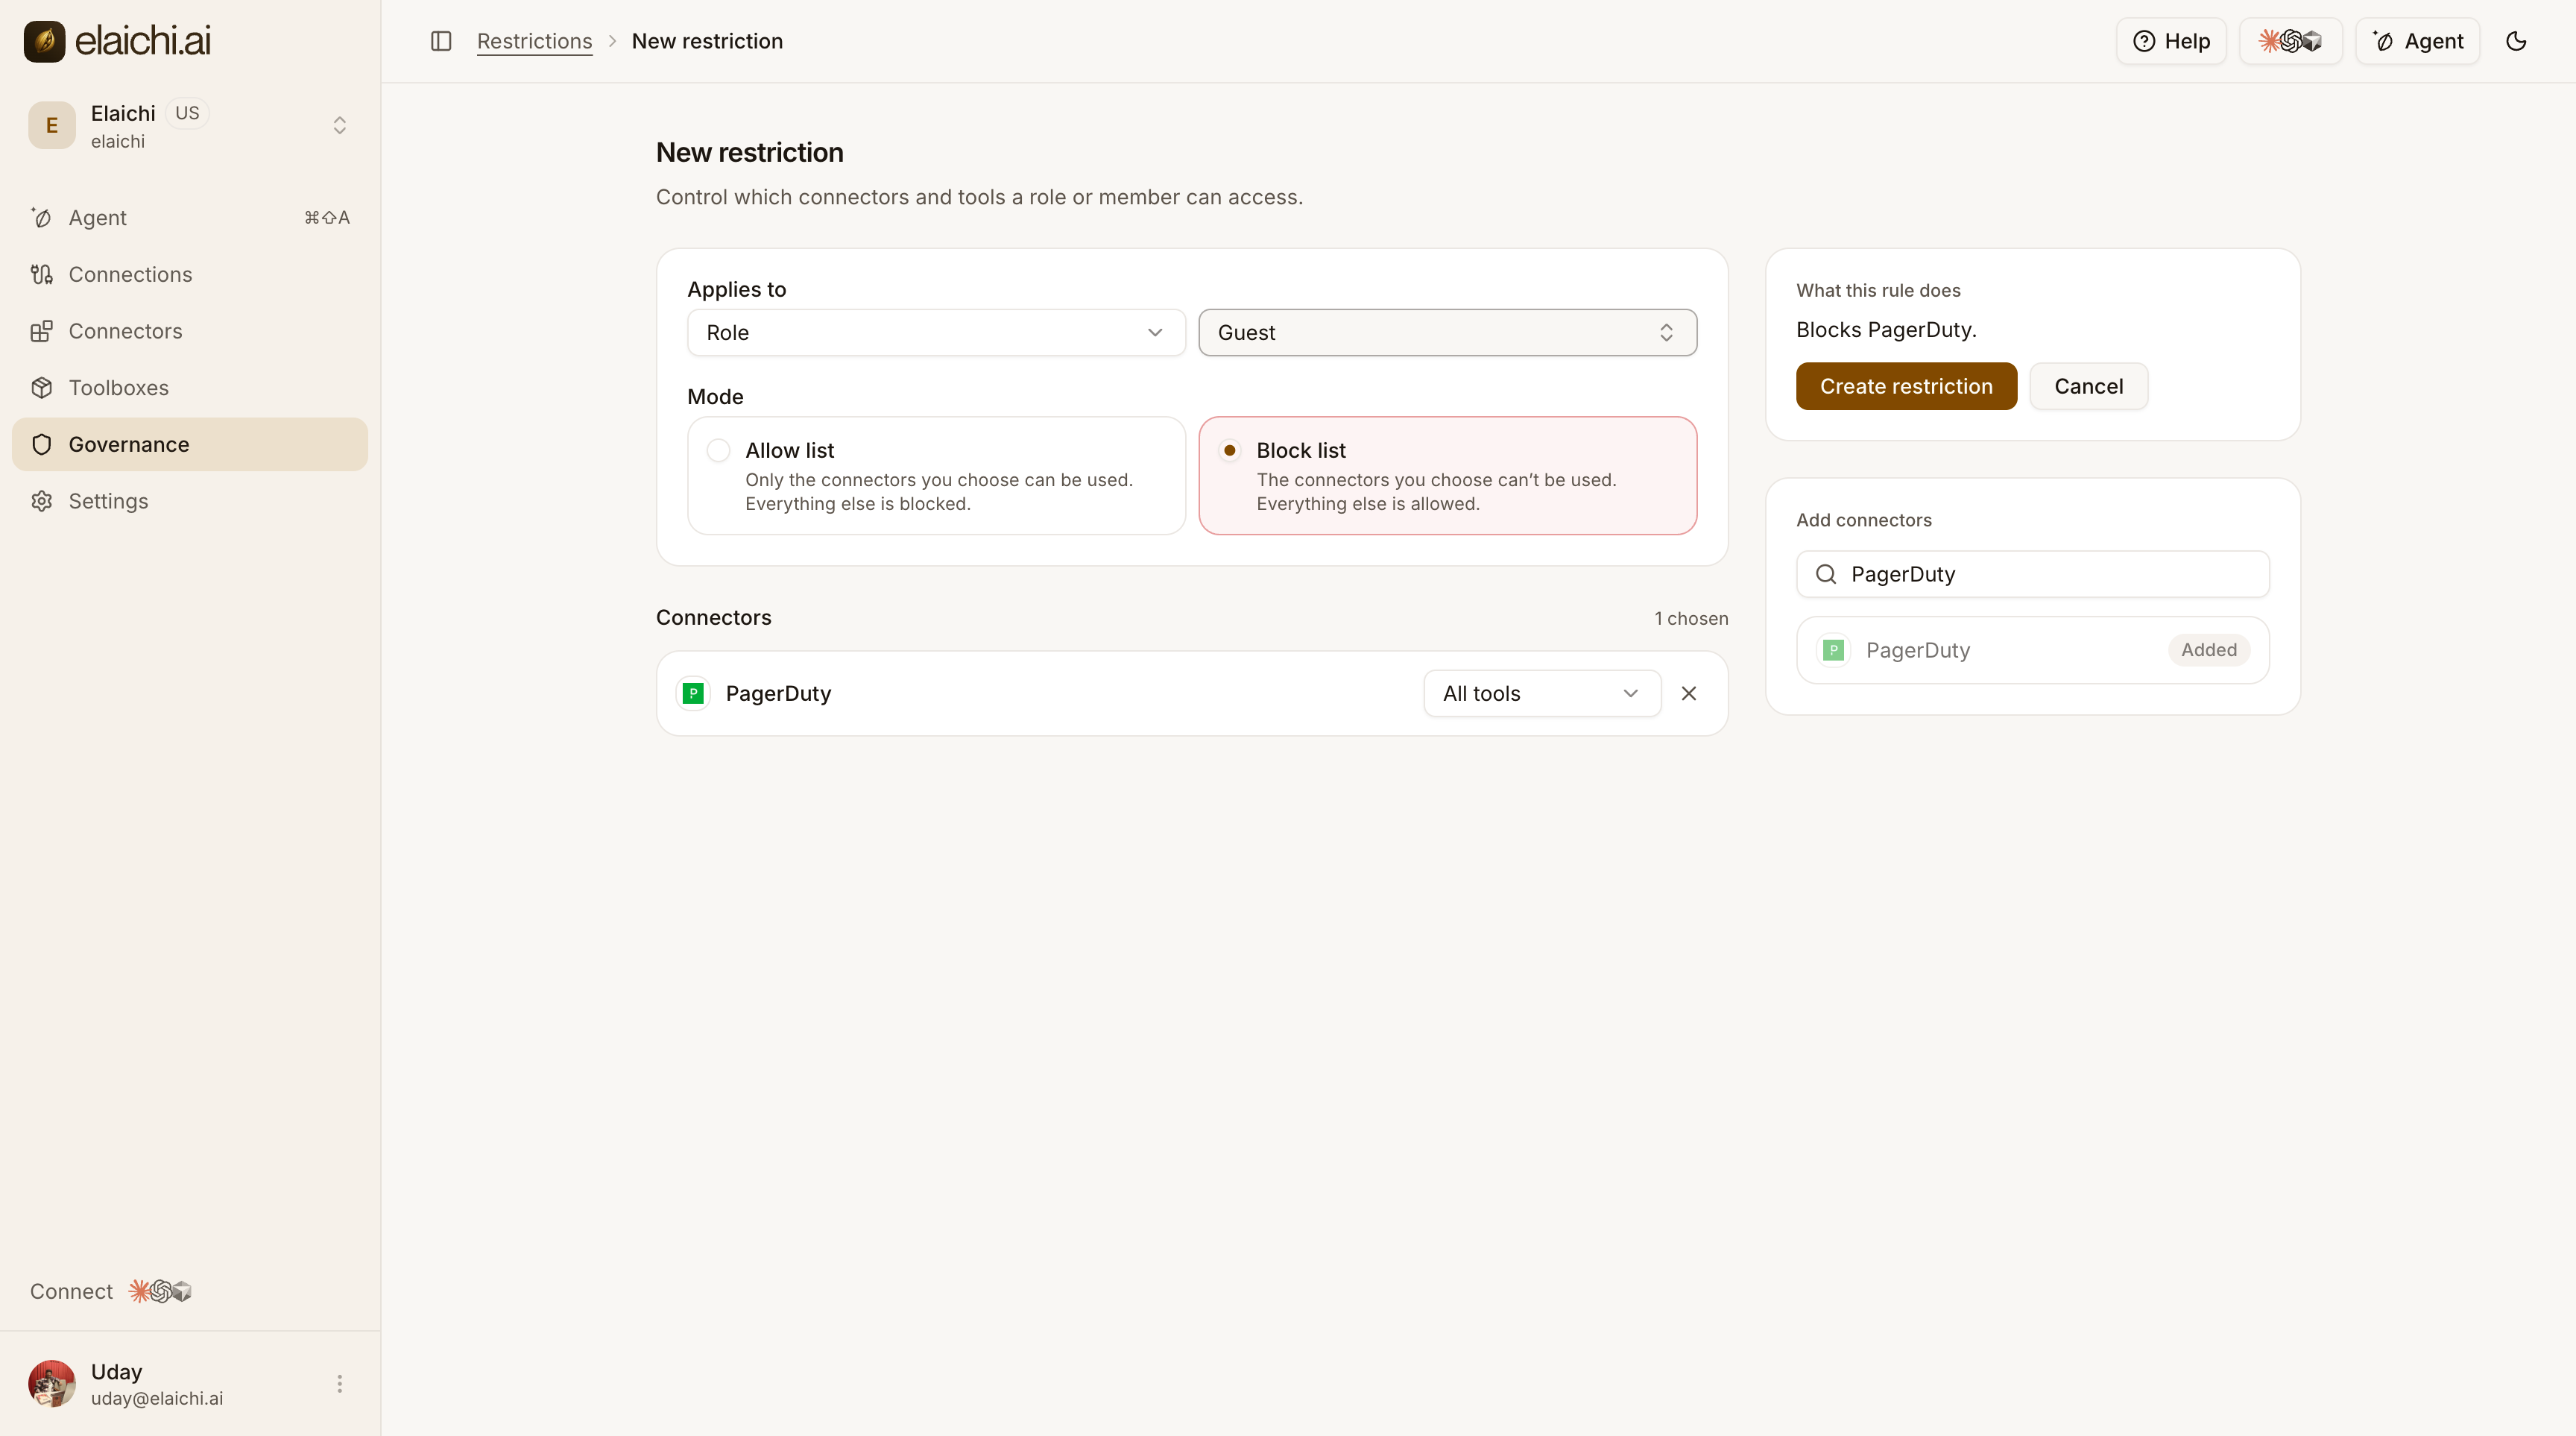
- Open Governance → Restrictions and choose New restriction.
- Under Applies to, pick a Role or a Member.
- Under Mode, choose Block list.
- Under Add connectors, search for PagerDuty and add it.
- Keep All tools to block every PagerDuty tool, or pick only the tools you want to keep back, for example the tools that change incidents.
- Choose Create restriction.
Restricted tools do not appear in AI clients, and a direct call to one is refused. See Set restrictions.
Connect your AI client
Add this endpoint as an MCP server in your AI client, then sign in with your Elaichi account. You can also copy it from Connect at the bottom of the sidebar in Elaichi.
https://api.elaichi.ai/mcp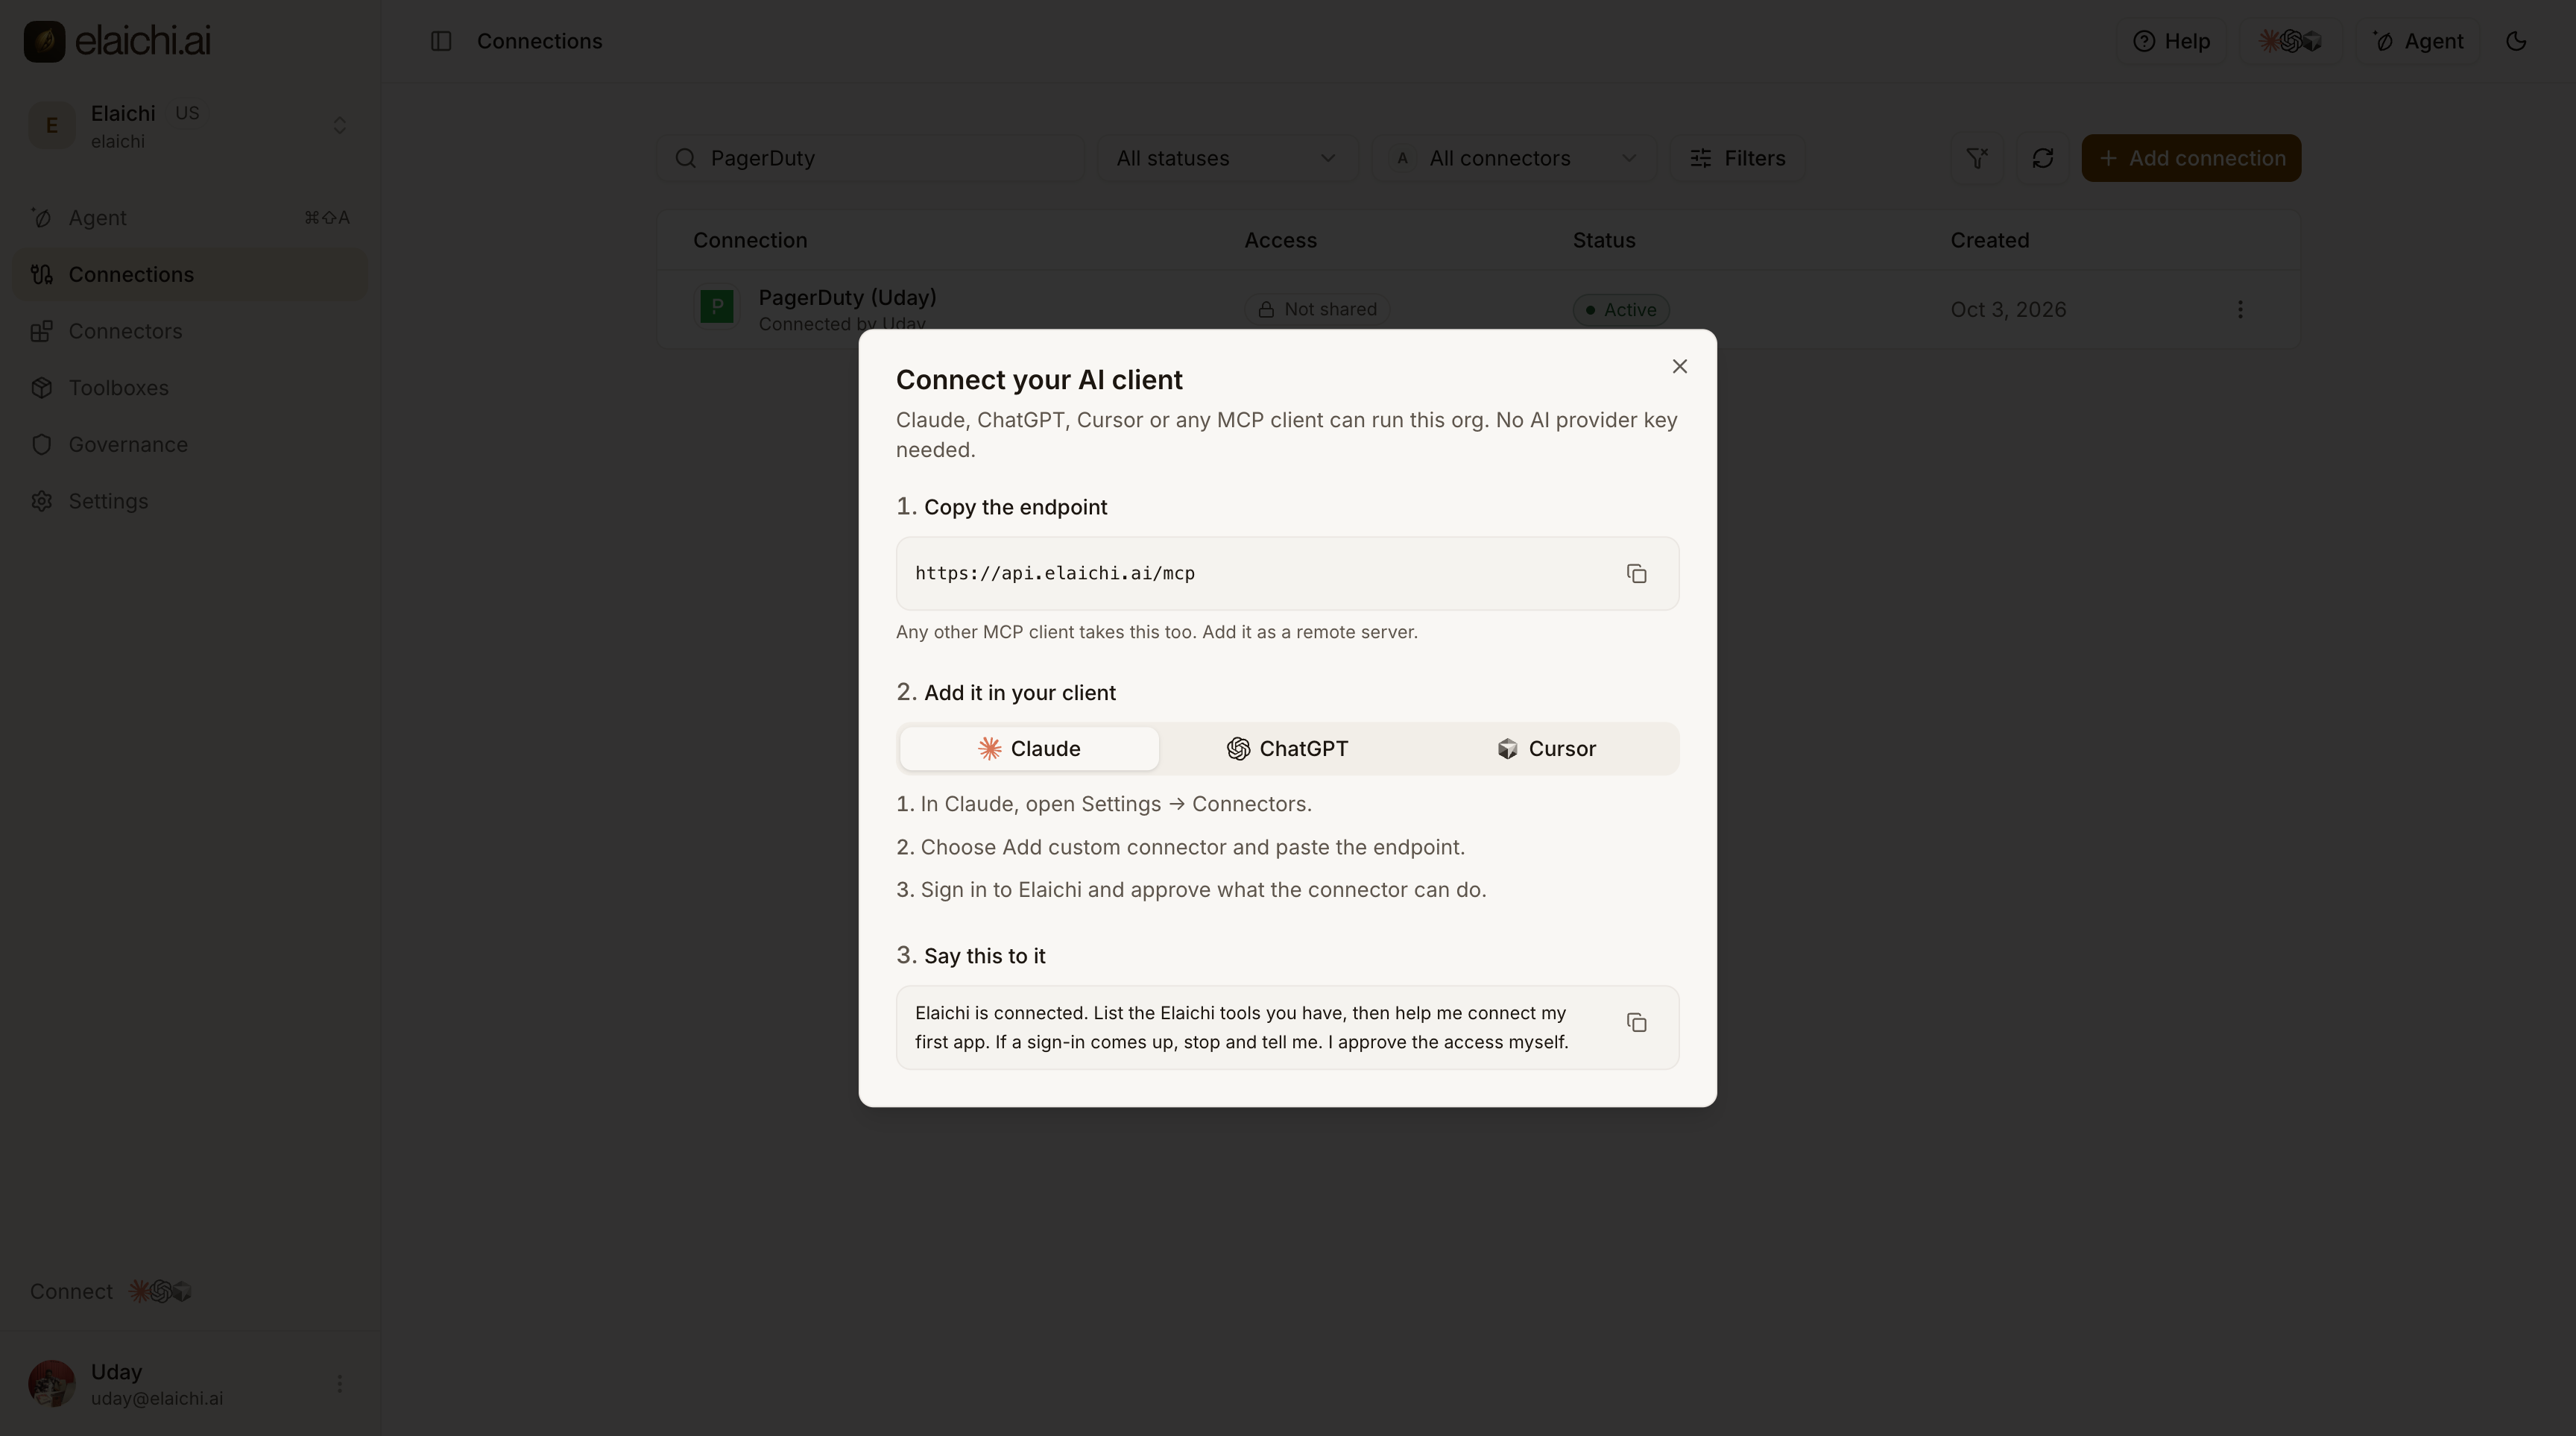
Step-by-step instructions: Claude, ChatGPT, Cursor. To skip this step, use the Elaichi Agent in the web app.
Try it
Ask your AI client:
- "List the open incidents in PagerDuty."
- "Who is on call for my services right now?"
- "Summarize the PagerDuty incidents from the last 7 days."
- "Acknowledge the newest triggered incident and add a note: investigating."
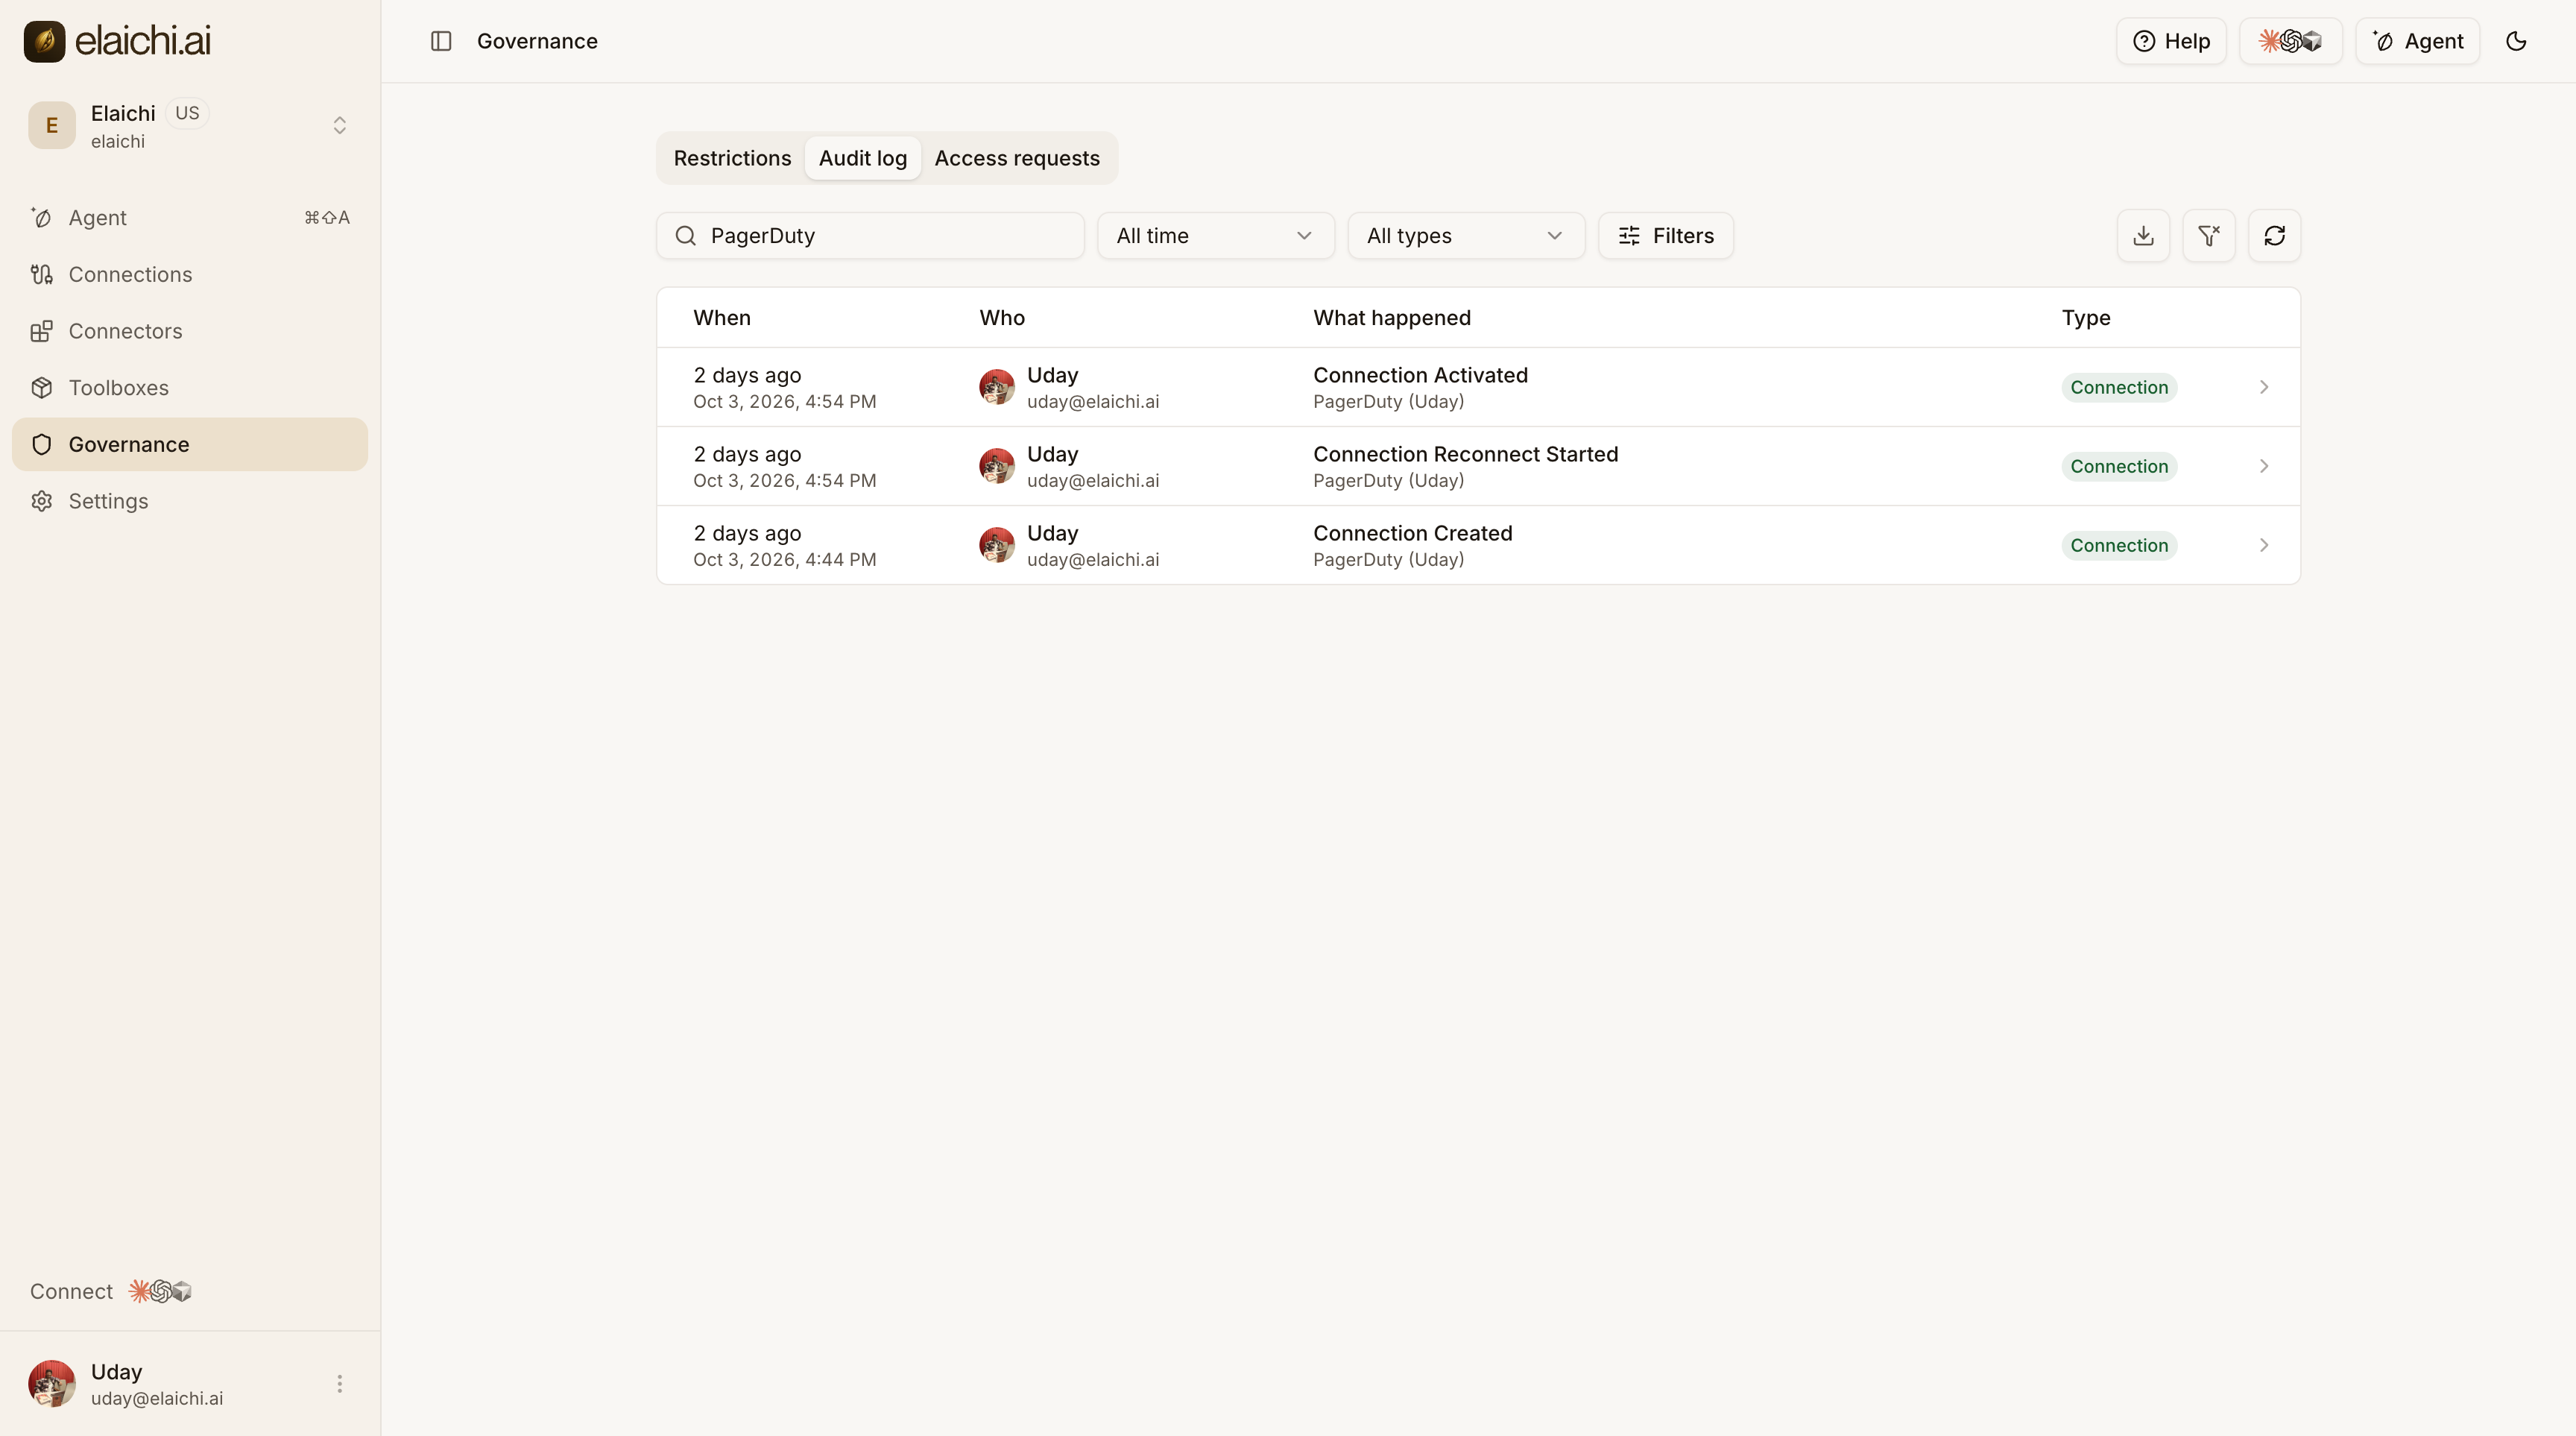
To see every call, open Governance → Audit log and search for PagerDuty.
How to uninstall
-
In Elaichi, open Connections.
-
Open the ⋮ menu on the PagerDuty connection and choose Delete, then confirm.
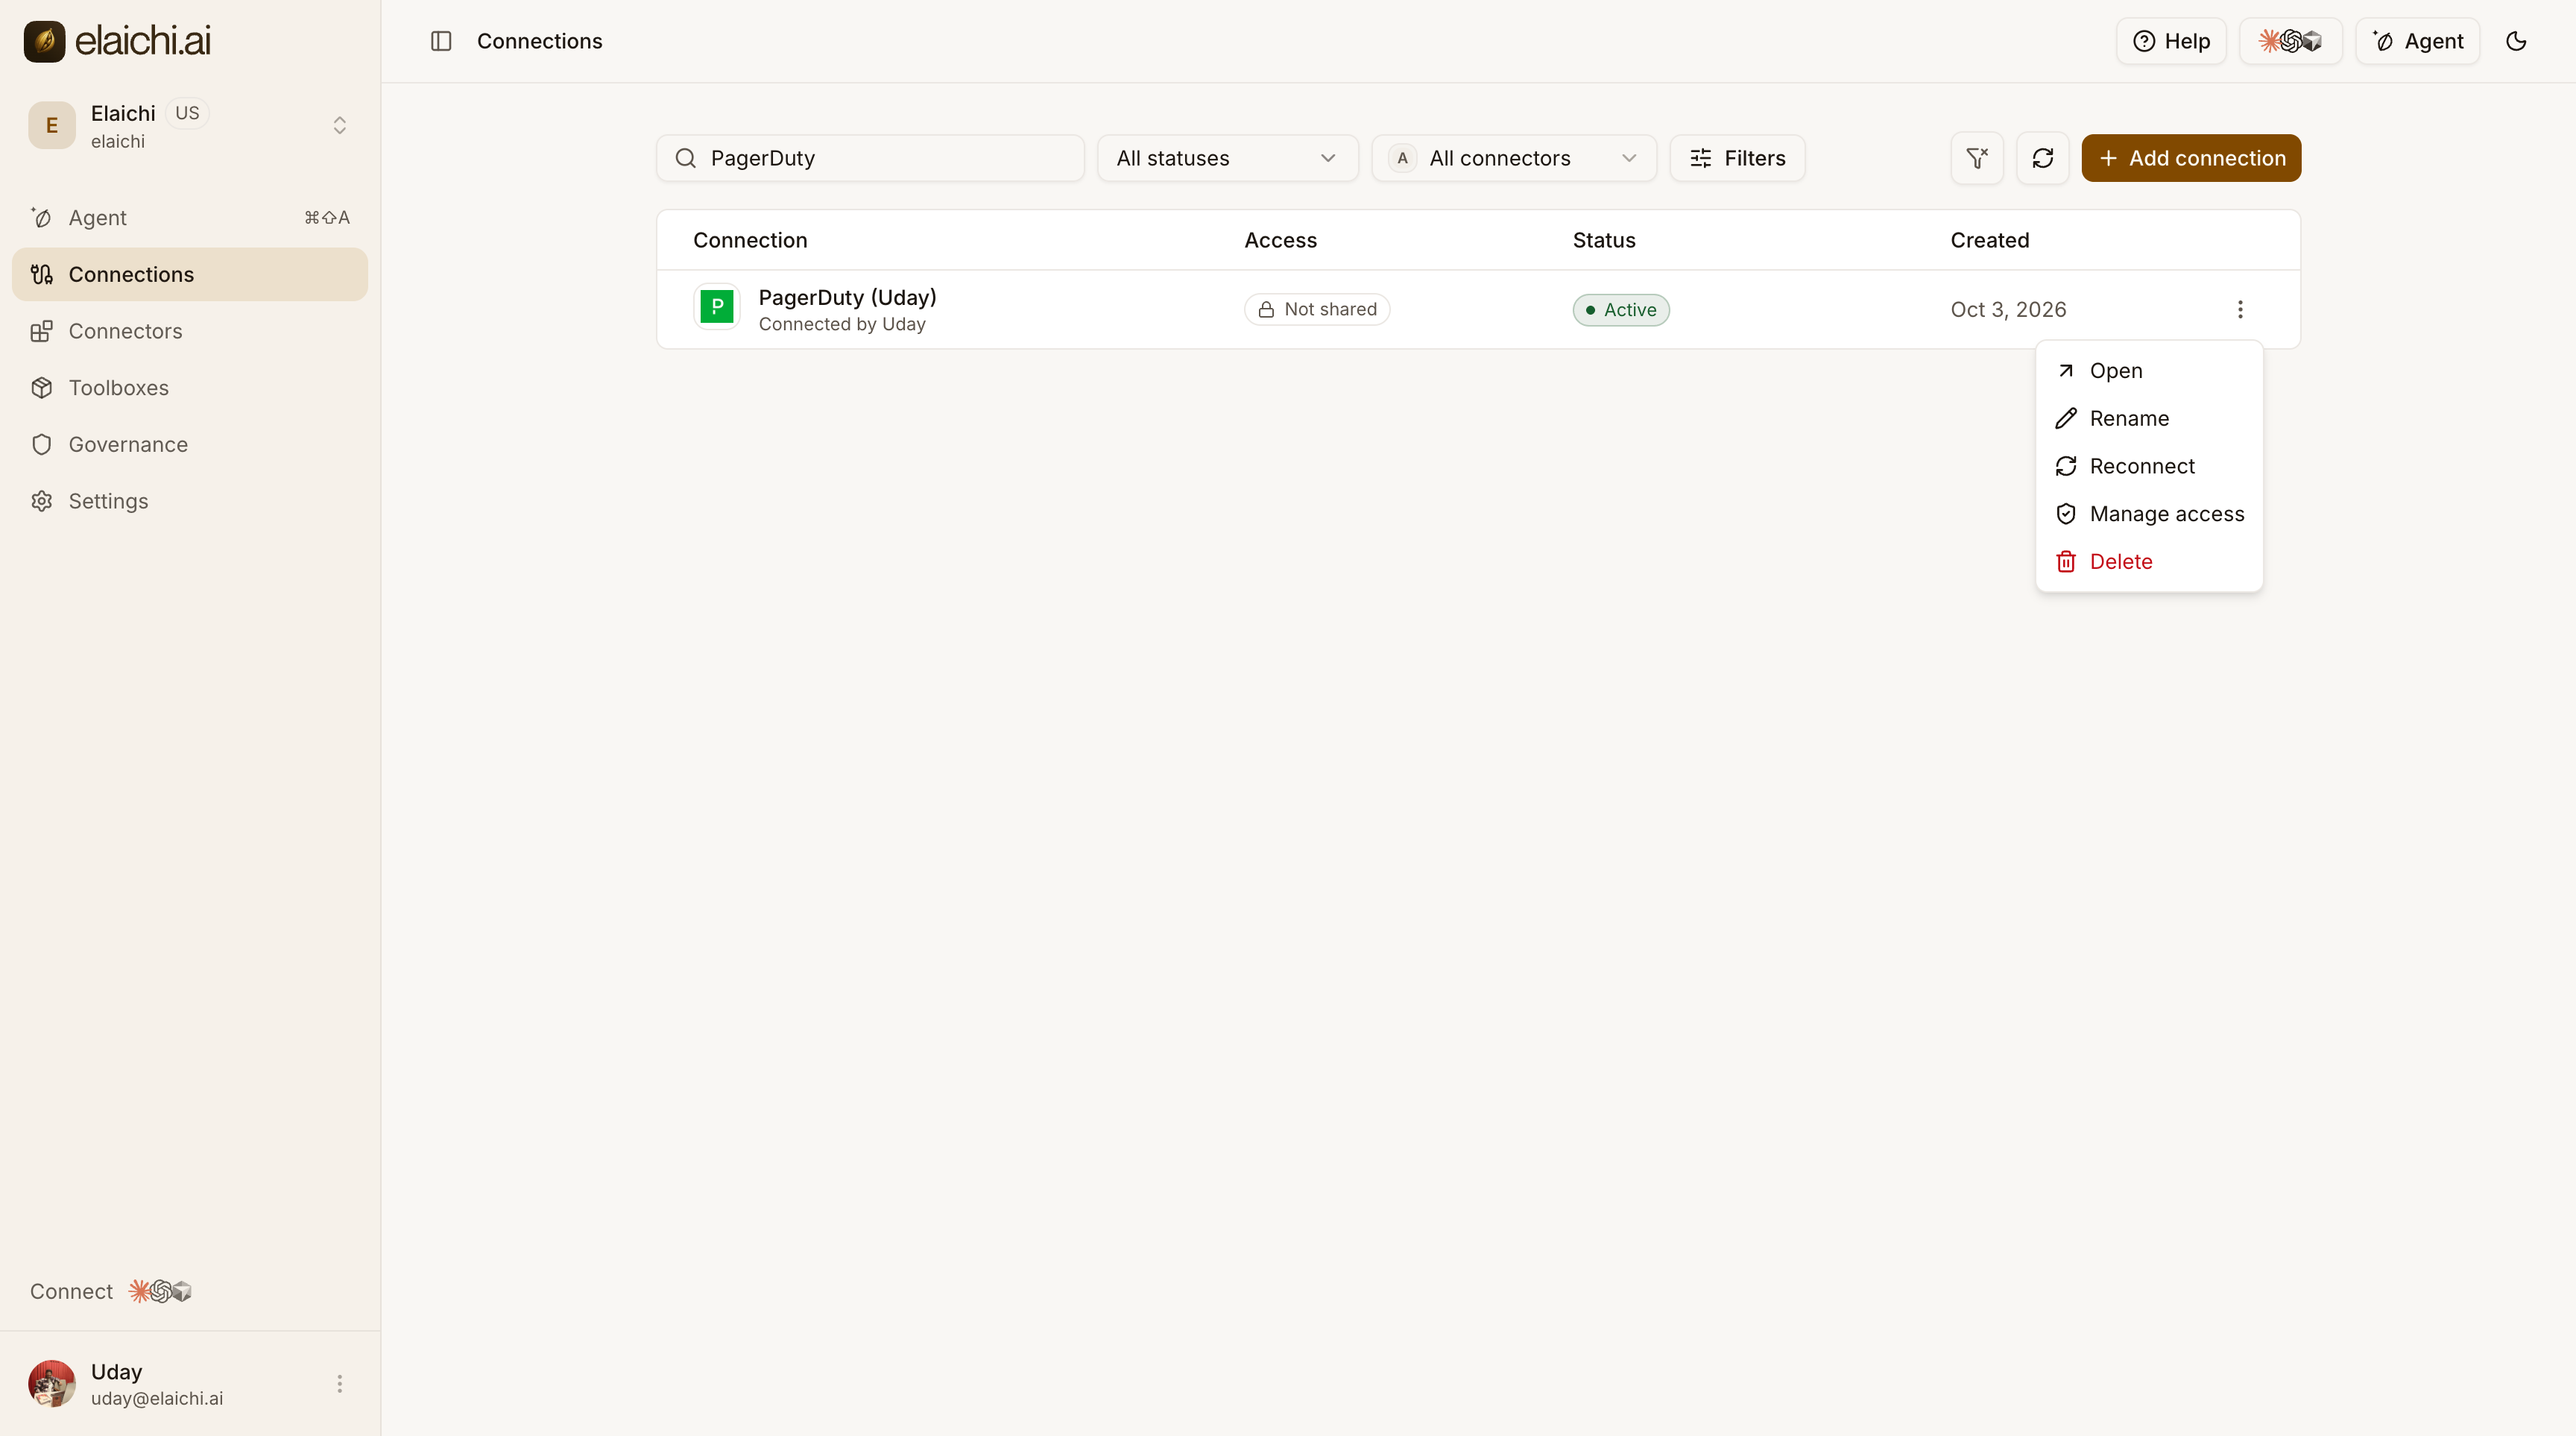
Elaichi deletes the connection and its stored PagerDuty credentials. PagerDuty tools disappear from every AI client and toolbox right away, and no further calls reach PagerDuty.
To also remove the grant on the PagerDuty side, revoke Elaichi from the authorized apps in your PagerDuty user settings.